Programming Walk-Through
There are activities in this walk-through which count towards your L01 (Lab) and H01 (Homework) grades this week, so pay very close attention!
Part 1: Overview
Becoming a Modern programmer
Programming is more than just writing code and solving problems. Modern programming is a collaborative activity. For instance, so many people contribute code to the Linux kernel, the number of contributors is too high to count! This is why one of the learning objectives of this course is to:
"Understand how to code in teams, collaborate with others and manage source code."
To do that we need to learn and use the same tools and techniques that actual programmers use. It’s going to steepen our learning curve a bit, but trust us when we say it’s worth it!
Remember. Today’s programmers:
- Use the command line to operate their computer.
- Use git (or some other source code manager) manage their code.
- Write code that is easily understood by others
- Can explain their code to others (including non-programmers)
You’ll do each of these, many times throughout this course. You’ll start some of them RIGHT NOW!
Goals of this walk-through
The goal of this exercise is to get you acquainted with the process of “how we will code” in this class. It DOES NOT focus at all on programming itself. In fact all the code will be written for you. Instead we will focus on the PROCESS of coding.
We will cover the tools you will use throughout the course such as the command line / terminal, git, GitHub, and Jupyter Notebook to write our programs, execute them, then commit your work so your others can view it.
Upon the completion of this walk-through you should be able to:
- Locate your Learn-Python code repository on your computer and open the command line in the repository folder.
- Use Python’s Jupyter Notebook environment.
- Write and execute a simple Python program.
- Use
gitto commit your code changes and push them over the Internet to GitHub. - View your code changes on the GitHub website.
After you complete this walk-through you should have a good idea how to work on your code in-class and save your work to GitHub.
Before You Begin
Before you complete this walk-through you should need to make sure you’ve completed the course setup checklist. You cannot complete this walk-through without it! If for some reason you’ve haven’t completed the course setup checklist (ahem… shame on you!) then you should do so NOW.
NOTE: You cannot complete the lab or homework without first following the course setup checklist to set up your laptop.
Part 2: The Programming Process [L01]
In this part we will guide you through the programming process step-by-step. When you are finished with the process you will have completed your first lab, L01, and handed it in to Github for a grade!
In this walk-through we will simulate your typical workflow when working on labs, recitations, or homework assignments in this course. Specifically we will:
- Open, Edit, and Execute a Python program using Jupyter Notebook
- Open the command line in our Learn-Python git repository
- Save our code changes to git, then push them to GitHub
- View our saved code locally and on the GitHub website.
Step 2.1: Open, Edit, and Execute a Python program using Jupyter Notebook
The primary tool we will use to program in Python is called Jupyter Notebook. This is the preferred development environment of Scientists, Data Analysts, and of course Data Scientists. The notebook environment is beneficial to these disciplines because you can combine instructions with code and intermix visualizations such as tables, map and graphs. Jupyter runs as a mini web server within the Azure Notebooks environment thus all you’ll need to write and run your code is a web browser.
- Log on to Azure Notebooks: https://notebooks.azure.com with your SU email and NetID password.
- From the Azure Notebooks home page select the IST256 project.
- From the IST256 project page, click the run button (It will probably say “Run on free Compute”). This will launch the Jupyter Notebooks environment. You can tell the environment has launched as you will see “Powered by jupyter” at the top of the page.
- Next, we have to navigate to our code. We’re in Lesson 01, so we have to find that folder:
- Click on your Git repository folder.
- Click on the content folder.
- Click on the lessons folder.
- Click on the 01 folder.
- You should now see the folders pertinent to this lesson:
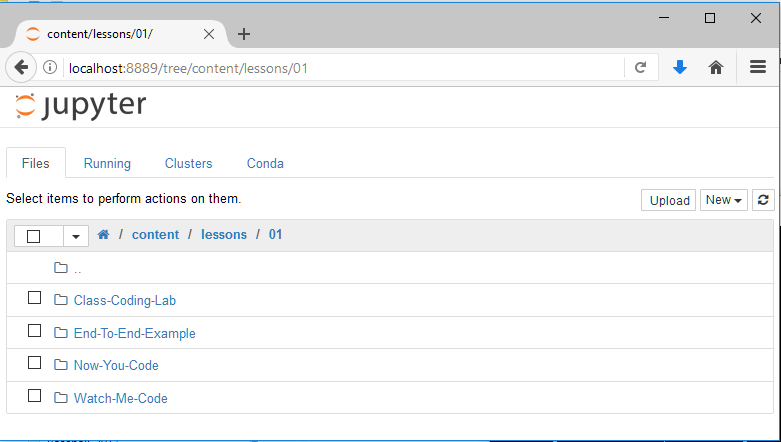
NOTE: There are typically 4 folders per lesson, defined as follows:- Watch-Me-Code This folder contains the code demos as part of lecture day.
- End-To-End-Example This folder contains the end to end examples as part of lecture day.
- Class-Coding-Lab This folder contains the class coding lab and supporting files.
- Now-You-Code This folder contains the homework exercises. One will be worked on during recitation, the other must be finished by the end of the week.
- The code we will write is in the Class-Coding-Lab folder. Double-click on that folder. You should see the file:
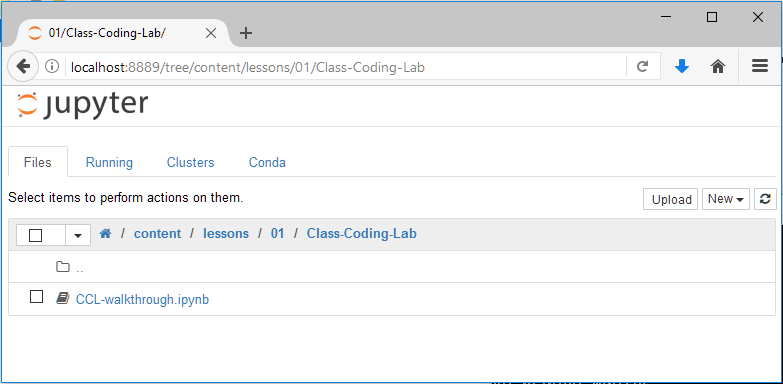
Files ending with .ipynb are Jupyter Notebook files. - Double-click on CCL-walkthrough.ipynb to open the notebook file. Notice this opens a new Tab in your browser window:
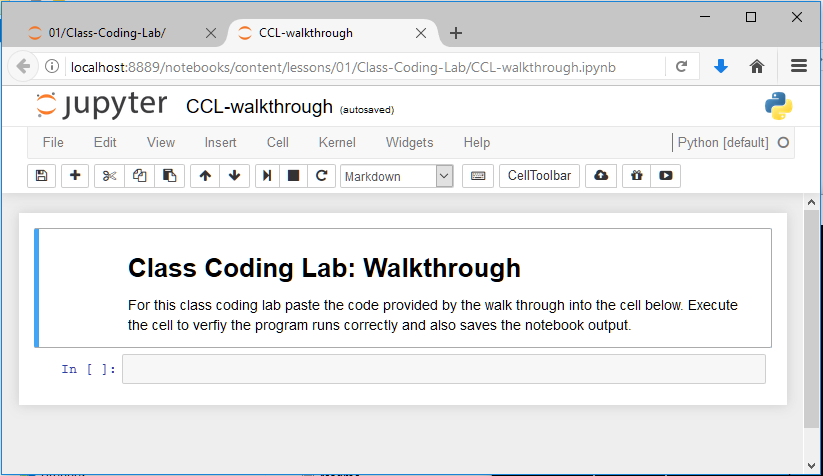
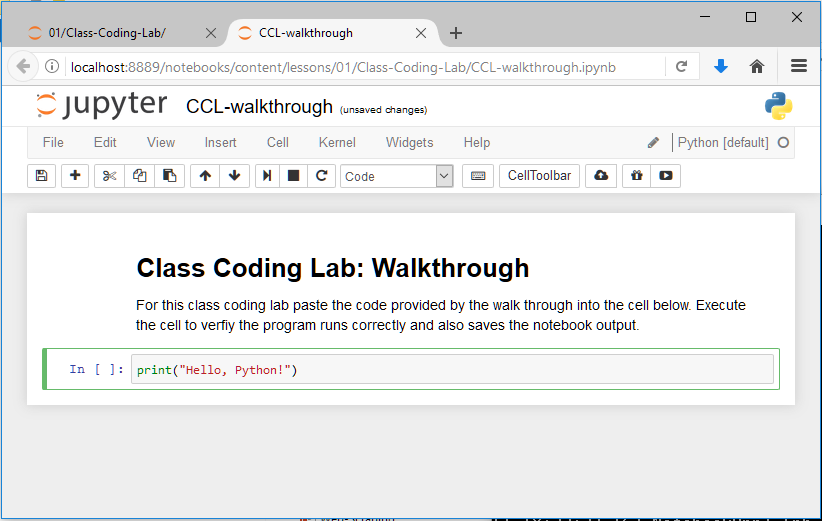
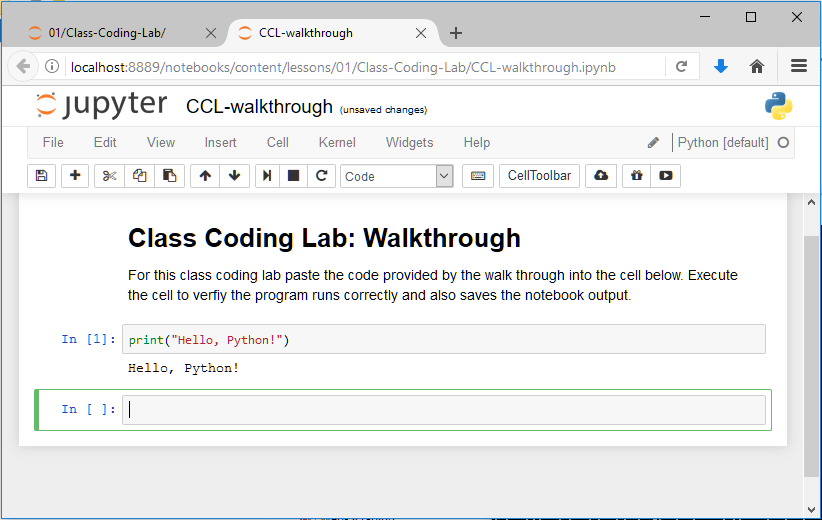
- Let’s write some code! Click on empty cell beneath the text. It should now be outlined in GREEN. Type the following code in the cell:
print("Hello, Python!")your screen should look like this:
- To execute the code from the current cell, press Shift+Enter or press the play button beneath the menu item named “Cell”. The code in the cell will execute, and underneath it you will see the output:
Jupyter then places you in a new cell where you can write additional code.
NOTE: There are also menu and button options for running code in a cell that you can find by exploring… - The next thing to understand about the Jupyter notebook is that it uses a modal editing system. This means that the effect of typing at the keyboard depends on which mode you are in. The two modes are:
- Edit mode: Indicated by a green border around one cell. Whatever you type appears as is in that cell. This is how you code.
- Command mode: The green border is replaced by a Blue and grey border. Key strokes are interpreted as commands — for example, typing
ltoggles line numbers. - To switch to command mode from edit mode, hit the Esc keyboard
- To switch to edit mode from command mode, hit Enter or click in a cell
The modal behavior of the Jupyter notebook is a little tricky at first but very efficient when you get used to it. In this screenshot, I’ve toggle line numbers on for cell with code in it:

PRO TIP: Need a list of commands? Open the command pallette from the toolbar. It lists all the available commands! What key do you press to save the notebook? Press it now!
- Next, Let’s paste in some sample code which really shows off the power of Jupyter notebook. This code, taken from http://matplotlib.org/1.4.1/examples/pie_and_polar_charts/polar_bar_demo.html will generate a polar chart of random data. Copy and paste the following code into the cell beneath your Hello, Python! program:
%matplotlib inline
import numpy as np
import matplotlib.pyplot as plt

N = 20
theta = np.linspace(0.0, 2 * np.pi, N, endpoint=False)
radii = 10 * np.random.rand(N)
width = np.pi / 4 * np.random.rand(N)

ax = plt.subplot(111, polar=True)
bars = ax.bar(theta, radii, width=width, bottom=0.0)

for r, bar in zip(radii, bars):
    bar.set_facecolor(plt.cm.jet(r / 10.))
    bar.set_alpha(0.5)

plt.show()
Don’t worry about what this code is doing right now. You’ll learn to understand it in time!
When you paste and execute the code you should see this:
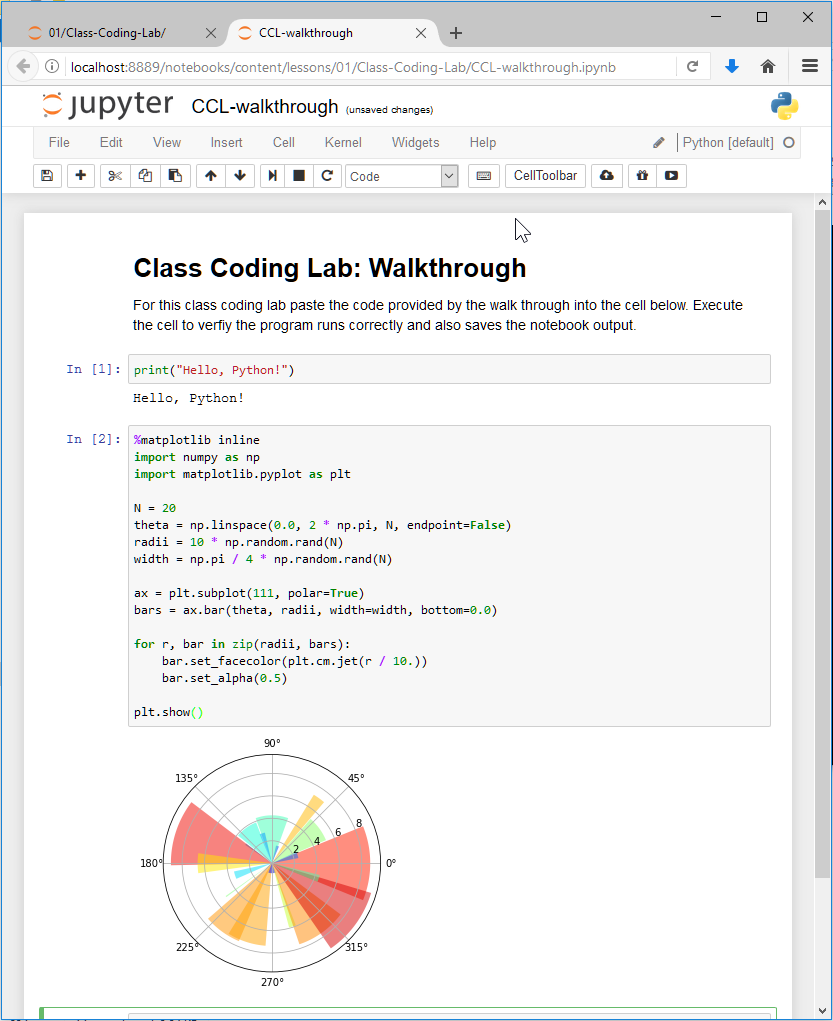
NOTE: The chart will be different each time it runs as its based on random data.
- In this final coding step, we will write code to test your Python setup. Type the following code into a new cell below your chart:
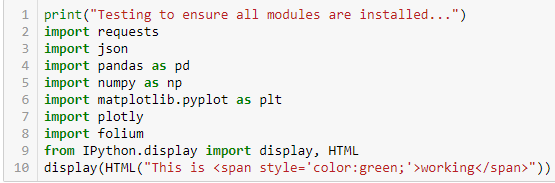
We gave you a screen shot of the code this time to force you to type it in! Practice makes perfect!
If the code executes correctly, you should see the message This is Working in the program output. Working will be colored green, like this:

HELP I GOT ERRORS!!! If you get an ImportError then you will need to go to another cell and import the missing module. For example, if you are missing matplotlib in the cell you would type:
!pip3 install --user matplotlib to add the missing bits to Python. Yes there’s a ! character in frot of the command. This instructs Jupyter notebook to drop down to the command line.
Exiting Your Jupyter Notebook File
So you are done with your Jupyter notebook file, so how do we save and close out?
- Save your work. Enter command mode and press
sto save. - Exit the notebook page. From the Jupyter menu select File then Close and Halt:
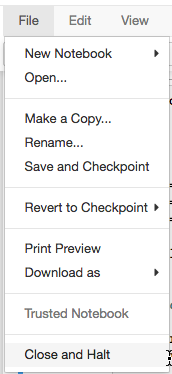
NOTE: It is important to exit the notebook file this way or else it will continue to run in the background. This will slow down other notebooks you attempt to run!
Step 2.2: Opening the command line in your Learn-Python git repository.
You will need to commit your code changes and send them to GitHub for grading. In order to do this, you must open up the command line (linux terminal) in your git repository folder.
YOU NEED TO KNOW HOW TO DO THIS IN YOUR SLEEP WITH HANDS TIED BEHIND YOUR BACK.
- From the Azure Notebook homepage https://notebooks.azure.com, select the IST256 project from the My Projects workspace.
- Click the Terminal icon to launch the terminal. This will give you access to the command line.
When the terminal launches you should see a command line with the promptnbuser@nbserver:~$ - Switch the current working directory to the
libraryfolder by typing:
cd ~/library - Your command prompt should now read:
nbuser@nbserver:~/library$
Next you need to switch into the local copy of your Git reposiotry folder. This will likely begin with the year and semester you’re taking the course e.g.2019-fall-learn-python-mafudge-su. For example, I would type:cd 2019-fall-learn-python-mafudge-su. The easiest way to find your folder is to type:cdthen type the year you’re taking the course, then press the TAB key and the teriminal will complete the rest for you! - Verify you are in the correct folder by typing:
git status
* If you are in the correct folder, you should seeon branch masterin the first part of the command output.
* If you are NOT in the correct folder, you will seefatal: not a git repositoryin the first part of the command output.
Step 2.3: Save our code changes to git, then push them to GitHub
During this walk-through we’ve made changes to the file: CCL-walkthrough.ipynb. Those changes are saved in Azure Notebooks, but how do we share them with our Professor? We’ll walk-through this process next.
- From the terminal you opened in the previous step:
- We’ve made some changes, let’s see what git has to say about them.
Type:git status
to check the state of our repository. The output should look something like this:
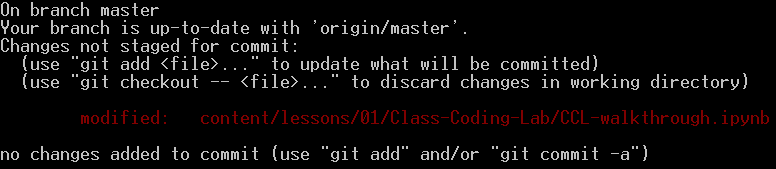
Git tells us we have changes which are not staged for commit. This means we’ve made changes and git doesn’t know about them yet. - You must tell git which changes to files you want to commit. This is called staging the commit.
Let’s tell git to stage all the changed files in the repository folder.
Type:git add --all
99% of the time this is what we want. - Let’s check the status of the repository now that we’ve staged our files.
Type:git status
again to see what’s happening in our repository.

Now git tells us the files we’ve changed are now ready to be committed. - Let’s commit the changes to git. What does this mean exactly?
Git Commit Explained: When you commit files, you’re saving the history of them to git repository. It’s like taking a snapshot of your repository folders’ contents at that point in time. Because you have this snapshot you are able to revert the files back to this point whenever you desire. As you can imagine, this is an extremely useful feature for programming teams who are making changes (good and bad) to their code. Think of the commit as an insurance policy: You hope you never need to use it, but it’s there for you just in case you do! Whenever we commit we should should add a message: something to remind us of the changes we’ve made. This is helpful in the event you need to cash in on that insurance policy!
Enough talk. Time to commit our changes.
Type:git commit -m "Completed programming walk through lab"
NOTE: The-mrepresents the message part of the commit.

The output says there we 1 files changed, and 56 insertions, meaning we added 56 lines of code since the last commit. Yes, git makes managing your team easy because it tracks not only who worked on what but also quantifies their contributions. Your information may vary slightly, of course. - Let’s check the status of the repository files now.
Type:git status

Now our local branch is ahead of ‘origin/master’ by 1 commit. This tells us our local git repository is newer than our remote copy on GitHub. We also have nothing to commit meaning our files are in sync with our local copy of git. This makes sense: we just committed! - The last step in the process is to sync up our local copy of git commits with on GitHub. Before we do that let’s explain the process.
The status message says Your branch is ahead of ‘origin/master’ by 1 commit. What exactly does this mean? Well, when we initially cloned the repository off GitHub, it made two versions of the repository. One is still on GitHub (git calls this one ‘origin/master’) the other is on your computer. When the two repositories get out-of-sync, we can reconcile them in two ways:- When the the local branch is ahead of ‘origin/master’ we need to execute a push to synchronize the two repositories, re-playing the local commits remotely on GitHub.
- When the the local branch is behind ‘origin/master’ we need to execute a pull to synchronize the two repositories, re-playing the commits on GitHub in our local repository.
- Since we’re ahead we should push.
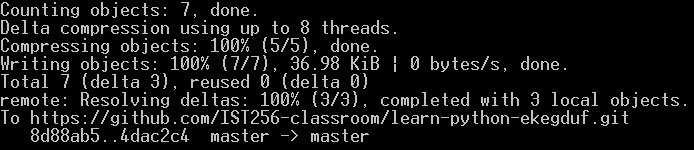
Type:git push origin master
You should see output similar to the following: (again your message might be different depending on what was changed)
- An one final check of the repository status:
Type:git status

Which is the same status from the beginning of the walk-through! It tells us nothing has changed locally and what we have here is now in sync with GitHub.
IMPORTANT: You’ll execute step 2.3 every time you code.
You should get in the habit of following this procedure after each coding session. Class is over? commit code and push to GitHub. Work on your homework for an hour? commit your code and push to GitHub. Not only will it record your changes for you in the event you need to undo a change, but it also backs up your work to the cloud in the event that work has a problem or becomes lost / broken! It’s great insurance against disasters and its so, so easy to do. You can push the same assignment multiple times. We professors will always look as the latest version!
Step 2.4: Visualizing your commits on GitHub
Once you get rolling with a few commits it might be useful to look back at the history of changes you’ve made. Let’s demonstrate that locally and on GitHub.
- Open your repository website on https://github.com. If you don’t remember what it is from the command line in your local repository
type:git remote -v
to display it. - From the GitHub repository Website, select commits
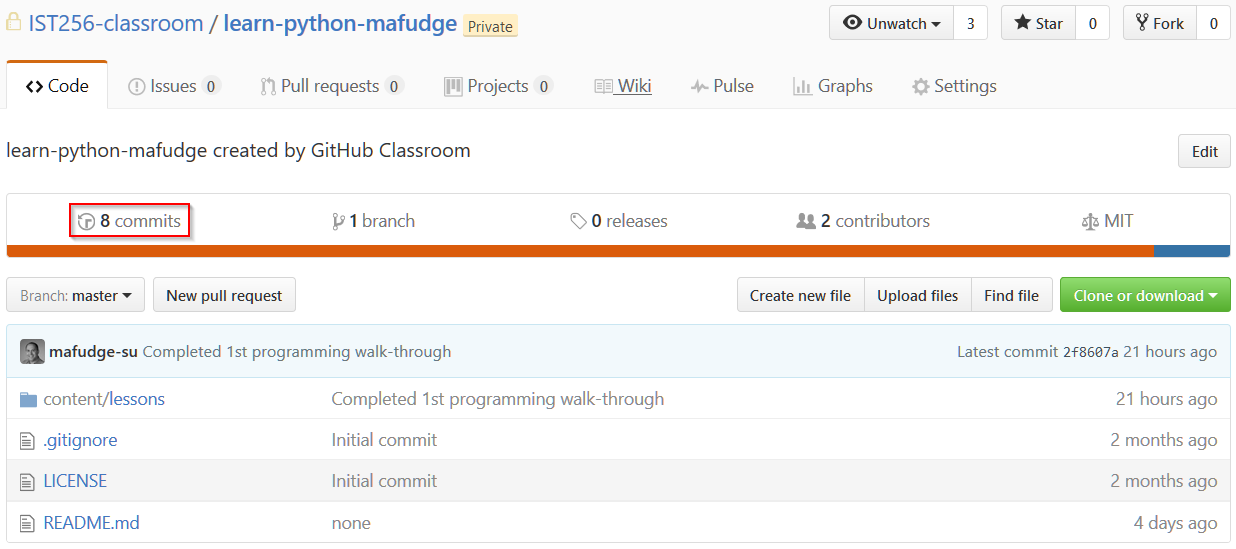
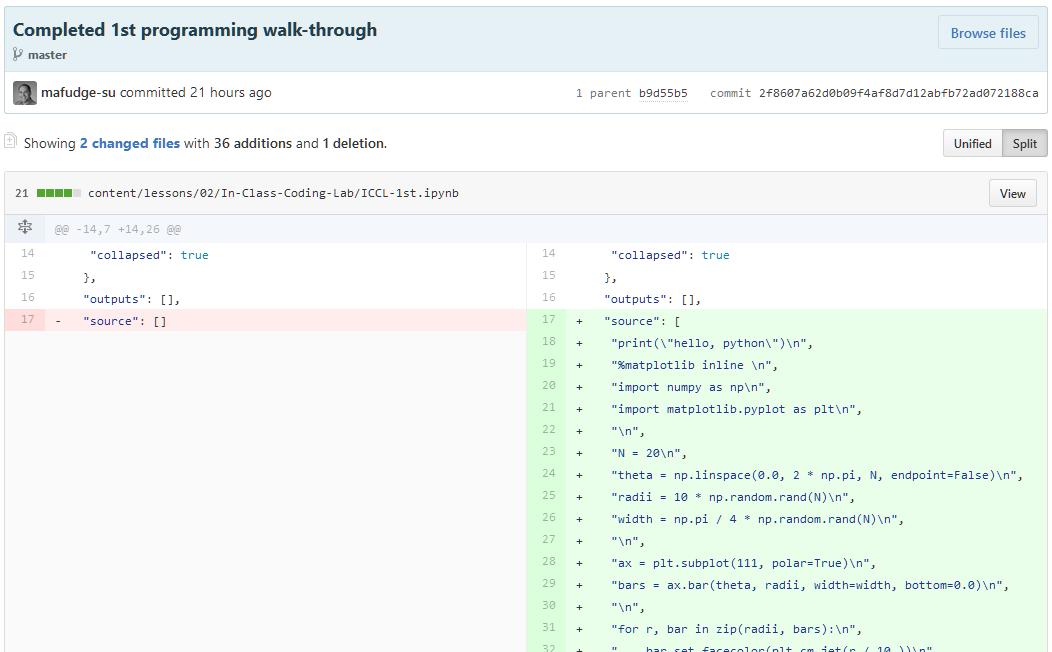
- From the commits page, select the commit for which you would like to view the changes
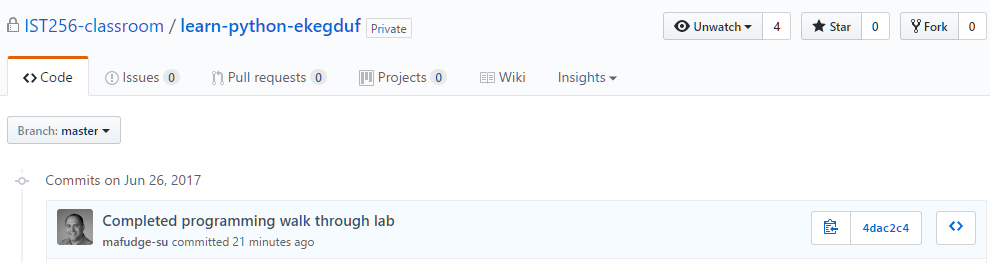
In this example you want to select the commit with message Completed programming walk through lab - You will then see a web of all the files changed in that commit. In this example we should see the file CCL-walkthrough.ipynb.
- On the left is the file before the commit
- On the right is the file after the commit
- Github uses the familiar red/green and
+ / -syntax as gitk
Part 3: On Your Own [H01]
Next, we will walk you through a typical homework assignment. Since we’ve focused on committing work to with git already, in this part we will emphasize how go about completing homework.
Similar to the labs, the homework assignments can be found in your git repository folder and you code the solution in Jupyter notebook.
Getting Started
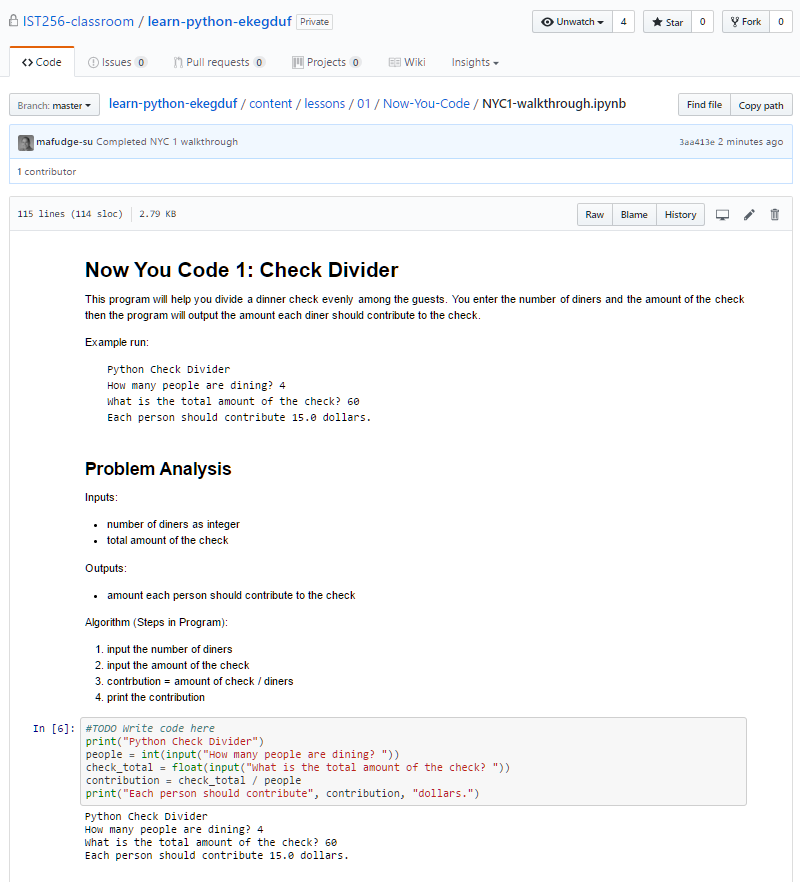
- Open the following file in Jupyter Notebook: lessons/01/Now-You-Code/NYC1-walkthrough.ipynb
- This homework assignment is similar to all the others. It consists of several sections: problem definition, problem analysis, section to write code, and some questions which encourage you to think laterally. Each of these sections should be completed before you hand in a homework assignment. At the bottom of the homework is a reminder of how the homework is evaluated. Use this to make sure you’re achieving the highest grade possible for your efforts.
Step 1: Problem Analysis
Before we can solve a problem with computer code, we must first understand the problem itself. This is an essential and often overlooked aspect of computer programming. Programming provides vast resources at your disposal, but unless you can combine them into a coherent solution they are not much use.
A good way to analyze a programming problem is with the input-process-output model. In this model we identify the inputs into the program, the expected outputs based on those inputs and then we write down the steps (the algorithm) to get from input to output.
Your algorithm, or steps should NOT be in any programming language. They should be written as atomic steps in a natural language. To become a good algorithm writer takes practice. It seems foreign at first but like anything the more you do it the more natural it becomes.
Let’s complete the problem analysis section together:
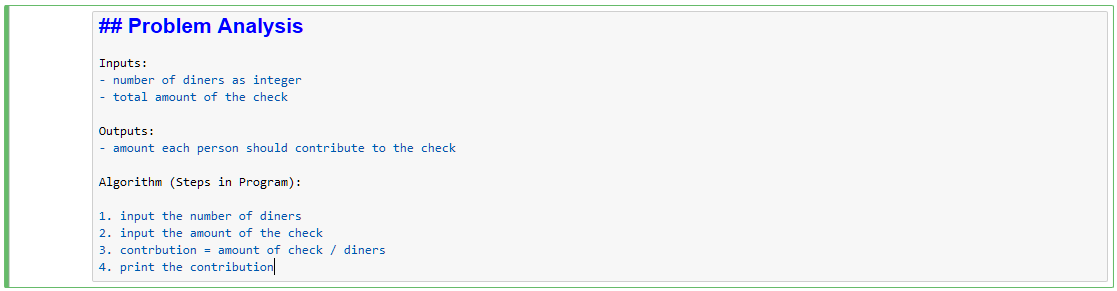
- Double click on the Problem analysis section to edit the markdown. When you’re in edit mode it looks like this:

- Add the following to the markdown, outlining the inputs, output, and process for this program. Again, this is a common problem solving approach.
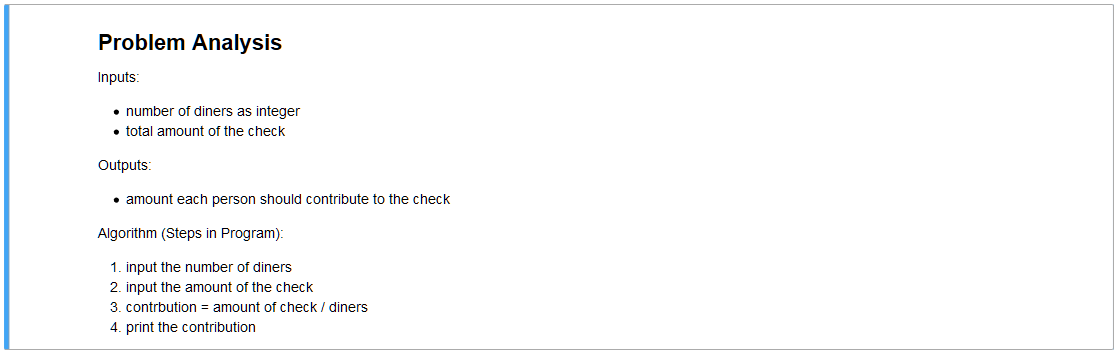
- When you are finished press
SHIFT+ENTERto execute the cell and save your documentation.
NOTE: For more complicated homeworks, you might spend an hour or so just thinking about your approach to the problem. I encourage you to do this “off line.” Most people are better problem solvers without the distractions of music, a computer, or background noise. Give yourself a chance in isolation to think about the problem deeply! You’ll be surprised how productive it can be!
Step 2: Write code
Now that we’ve outlined the problem and formally laid out a plan for writing the program, we can move on to writing our code. If you’re doing it right, this step is merely taking each line in your algorithm and asking yourself, “How do I translate this into Python.” When you’re doing it wrong, such as coding without a problem analysis, then this step will be painfully frustrating.
Let’s complete the code section together:
- Next, move into the code cell:
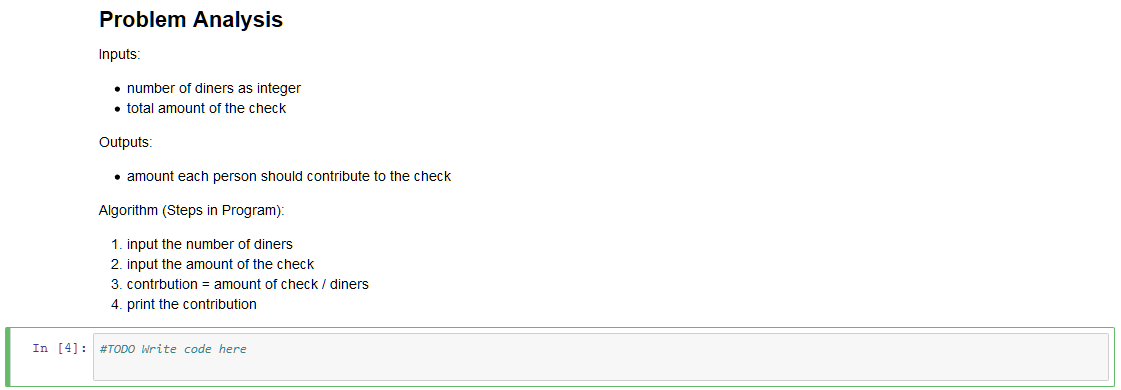
- And write the Python program:
print("Python Check Divider")
people = int(input("How many people are dining? "))
check_total = float(input("What is the total amount of the check? "))
contribution = check_total / people
print("Each person should contribute", contribution, "dollars.")
- When you are finished the cell should look like this:

- Press
SHIFT+ENTERto execute the code. Try the same inputs as in the example run at the top. Do you get the same outputs?
- Execute the program a few more times, trying different inputs and verifying the outputs the program gives you match those you would expect. For example a $20 check split with 2 people should be $10 each. Is it? You’ll have to “play computer” and figure out the outputs yourself. This is a key activity of good programmers - never “assume” the computer code is correct, “prove” it’s correct! In fact really good programmers write code to prove their code is correct, a process known as automated testing.
NOTE: Usually, it will take you several iterations of the previous 2 steps before your program is “done”. Why? Most problems are non-trivial and you are learning how to become a problem solver. Sometimes you won’t know your original plan is crap until you write code and run it. DO NOT get discouraged by this! Each failure is a lesson which helps us become a better, more experienced programmer. In fact the end result of any working program Facebook to Angry Birds is the culmination of a mountain of failures, dead-ends, and small victories en-route to a feature-complete application. This is what makes programming so frustrating yet gratifying at the same time. Learn to embrace failure and work it to your advantage!
Step 3: Questions
After you’ve completed the program you should answer the questions in the questions section. These are designed to “get you thinking” about the problem and test the flexibility of your solution. The questions usually focus on edge cases and potential pitfalls students may not have considered as they completed the homework. Completing them offers valuable insight into the program and ways to make it better. Many student go back and improve their program after answering the questions in an effort to score as high as possible on the homework.
- Edit the Questions cell and provide an answer to each question underneath the question itself. Since every student’s answer will be different I did not include a screenshot this time.
- You may have to run the program to answer some of the questions. Make sure you click off the question cell and back into the code cell to run the program!
NOTE: It is important to answer the questions in your own words, honestly and truthfully. We expect each student will answer these questions differently!
Finishing Up
When your homework is complete, you should save your work and commit the changes to Github so that your professor can grade it.
- When you are confident the program is correct you are finished writing the program. Save your changes and exit Jupyter notebook.
- Add your change to your local git repository.
- Commit your change with the message “Completed NYC 1 walkthough”
- Push your code to Github.
- Wait a minute, then verify your code, including proof it was executed via the program output is on the Github website.
At this point your homework has been turned in, and your professor should be able to grade it and determine whether you completed it on time, by checking the timestamp of your commit.